“Hi, buddies! I have made a really excellent PPT file and want to share it with my friends. How can I protect my PPT from editing or just post it on my blog? Should I convert PPT to video or just add password to it? ”
If we want to protect our PPT from editing and post it on blogs, the best way should be converting PPT to flash. We all know that almost websites can support flash videos.
But here we need a good PPT to video converter which can enable us to perfectly convert PPT to video and add background music for the converted video.
Please check out the tutorial of converting PowerPoint to flash.
Download a PPT to video converter here.
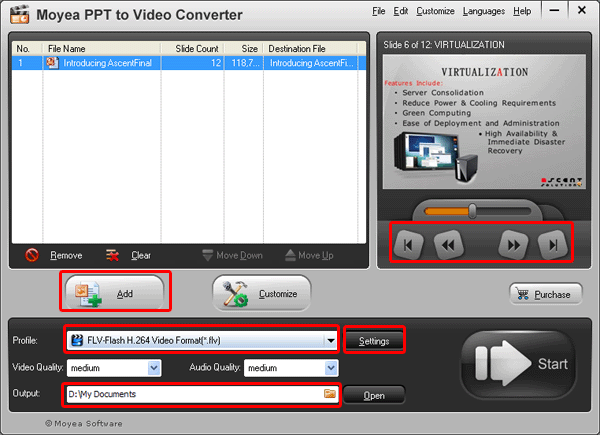
Step 1: input the PPT files to the converter and preview it on the view screen.

2 input ways are offered: directly drag and drop or click “Add”. By the way, you can click the buttons under the view screen for previewing.
Set the output video format as FLV and specify a folder for the converted video.
Step 2: customize settings
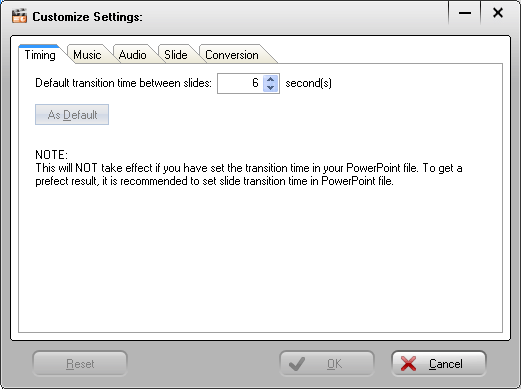
After load the PPT file, you can click “Customize” to adjust timing, slides, music, audio and conversion.

Timing can be adjusted to 6 seconds or even above. In addition, you can add background music for the converted video.
Step 3: audio and video settings
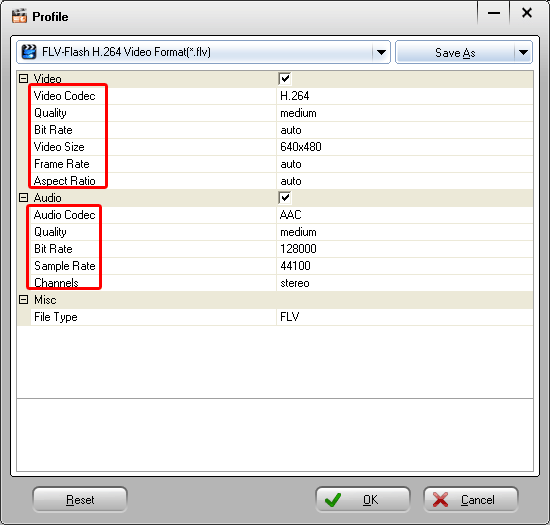
Click the settings icon to start the audio and video settings of the PPT to flash conversion.

Various parameters can be adjusted, including bite rate, video size, video codec, and video quality, etc.
Step 4: convert PPT to flash
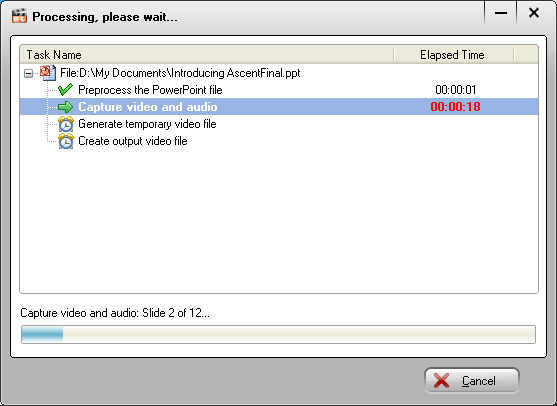
After all the settings, click the start icon to start the PPT to flash conversion.

The program will show us the PPT to flash converting process. Just wait until the PPT to flash conversion has been finished. Enjoy the video and post it on your blog.
Comments are closed.